- A parent wanting to give their child's teacher, specialist, or other important person working with their child, a unique gift
- Educators wanting to make a gift for a fellow educator, or wanting to add a little something extra to their own office/classroom
- Any crafty person
- A parent wanting to spice up the look of their child's playroom
- Homeschooling parents wanting to kick up the look of their home-school area
Crayon Clock Tutorial
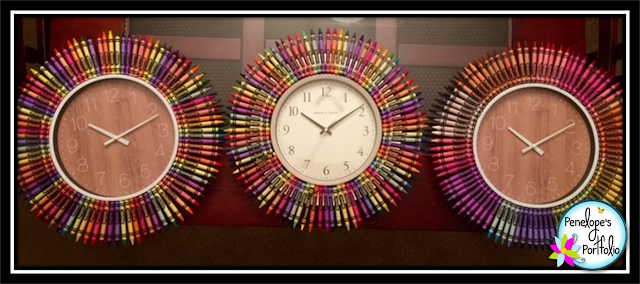
I recently came across a "crayon clock" (at least that is what I am calling it), and I immediately thought it would make a great teacher's gift. I was inspired to make one myself. I mean, how hard could it be? Lucky for you and me, it was EASY! In fact, it went so well, that I actually made three clocks for three different teachers. Since I didn't follow a tutorial, I made it up as I went, and this is what I came up with...
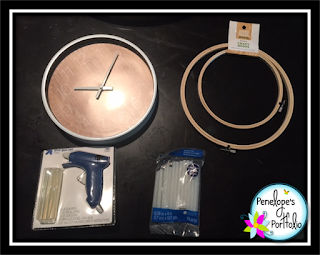
Materials
*Wooden Craft Hoops
*Crayons
Hot Glue Gun
Hot Glue Sticks
Clock
Scissors
*Wooden Craft hoops come in a variety of sizes. Determine the hoop size closest to the size of your clock.
*The size of the clock you use will determine the amount of crayons you need. A 10-12 inch clock will use about 100 crayons. If wanting to use a variety of colors, you may wish to purchase about 100 crayons to have options.
Step 1:
Determine the craft hoop size closest to the size of your clock, and separate the two hoops that are very close together. Determine how these hoops fit around the clock itself. You will not need to use the other set of hoops that came with the craft hoop.
The hoops I purchased were slightly smaller (about 1/2 inch) than the size of my actual clock. The larger hoop was easy enough to open up and make larger by removing the hardware connected to it. The smaller hoop did not have hardware, so I simply cut it using a sharp knife. It could then be opened to fit around the clock.
Step 2:
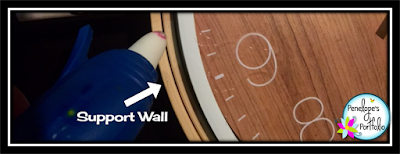
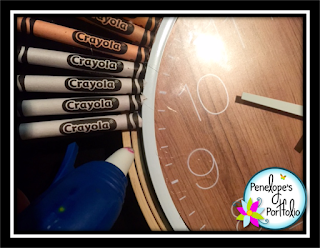
Hot glue the smaller hoop to the outside of the clock. Hot glue the slightly larger hoop on top of the smaller hoop. These loops make a "support wall" which the crayons lean against. You may hot glue the hoops anywhere on the clock desired. I chose to hot glue the hoops the width of a crayon from the edge of the clock face.
Step 3:
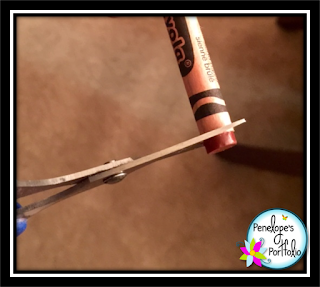
Cut the very ends of the crayons off so that only the crayon label is shown. The glue will stick well to the paper label itself, but will somewhat melt the crayon wax. Therefore, you want to avoid gluing the crayon wax directly, or you may end up with a messy project!
Step 4:
Determine your crayon color pattern, and make sure you have enough of what you need.
Step 5:
Glue the crayons to the support wall and to the clock.
Gently remove any hot glue strings, and clean clock face with a household cleaner. You are done!







thank u blogger
ReplyDeleteI recently came across your blog and have been reading along. we provide Sensory Bin Tools for sale at affordable prices. for more info visit our website.
ReplyDeleteLooking for a great deal on your next purchase from Eyezy? Check out our latest eyezy coupon code for a discount on your order. Simply enter the coupon code at checkout to receive your discount. Be sure to redeem your coupon code before it expires, as it may only be valid for a limited time.
ReplyDelete